Benefits of Opening your demat account with Zerodha: If you are still confused about why you should open a demat and trading account at Zerodha, then here are top reasons:
Documents required to open a demat and trading account at Zerodha.
Account opening charges at Zerodha
Here are the account opening charges at Zerodha
How to open your account with Zerodha Online?

On this page, to signup using your mobile number and verifying the OTP. Then you’ll be required to enter your PAN, bank account, Aadhar verification, and personal details to continue with the signup.
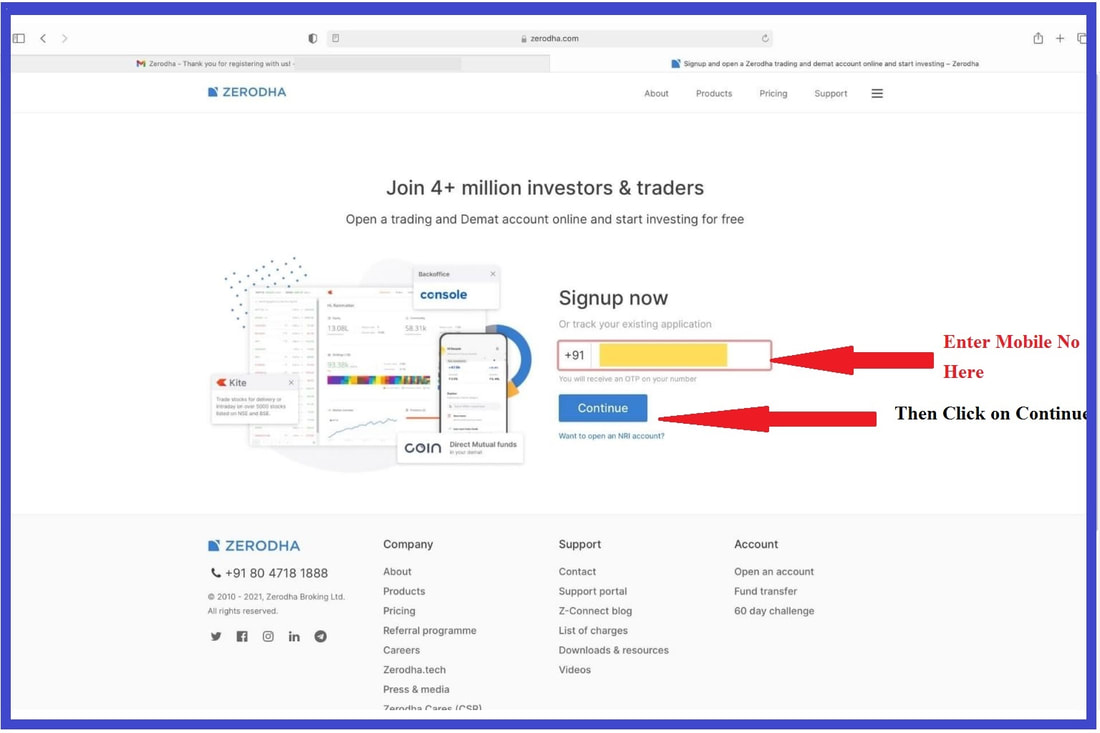
Enter your mobile number to Sign-up. You’ll receive an OTP to verify the mobile number.
The OTP will be valid to login for the next 30 mins. Please check your SMS and use the same OTP for you mobile number verification. 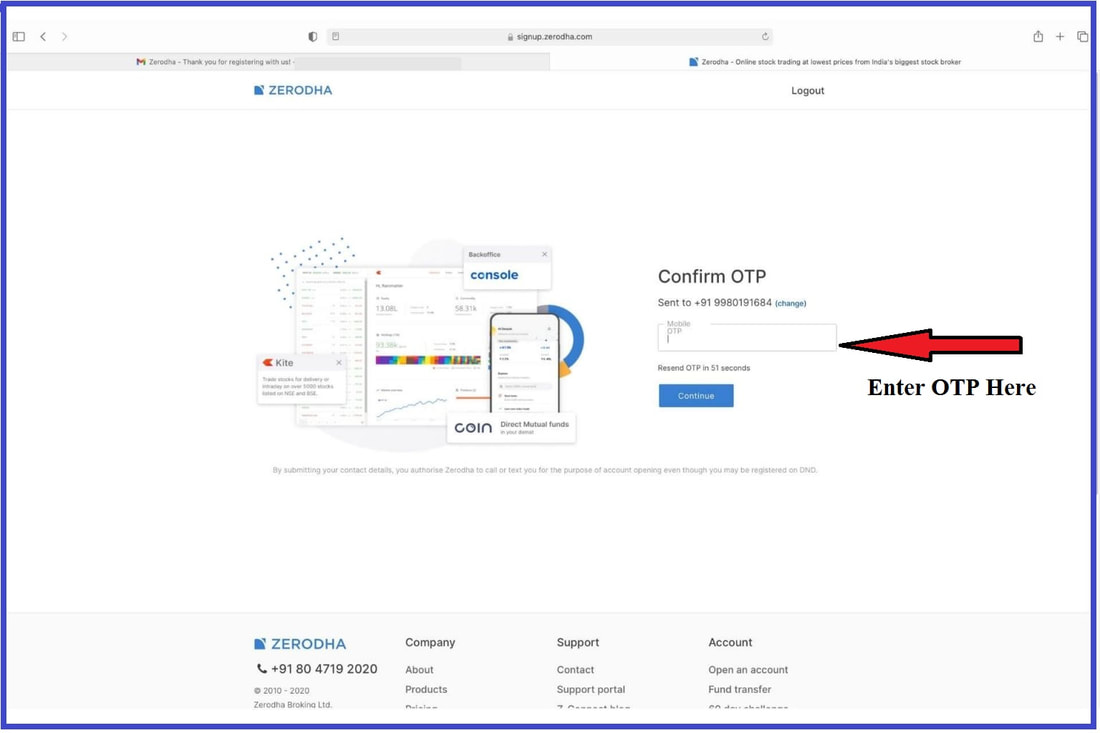

Enter the OTP you receive on your registered email ID as shown below and click on continue for Zerodha login


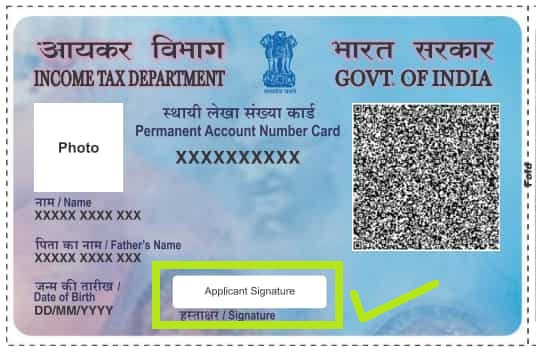
As the next step to create the Zerodha Demat Account login, you need to enter your PAN card number and Date of birth details as shown in your pan card.
Enter the details as asked and click on continue 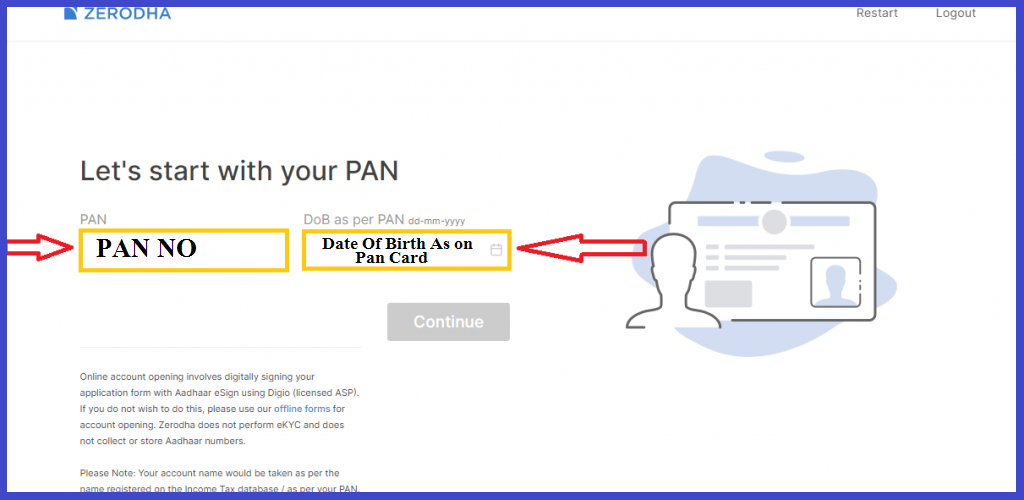
You need to pay the Zerodha Account opening charge which is Rs. 200 for Equity and Rs. 100 for commodities.
You can make payment through net banking or UPI and click on continue to make payment. 
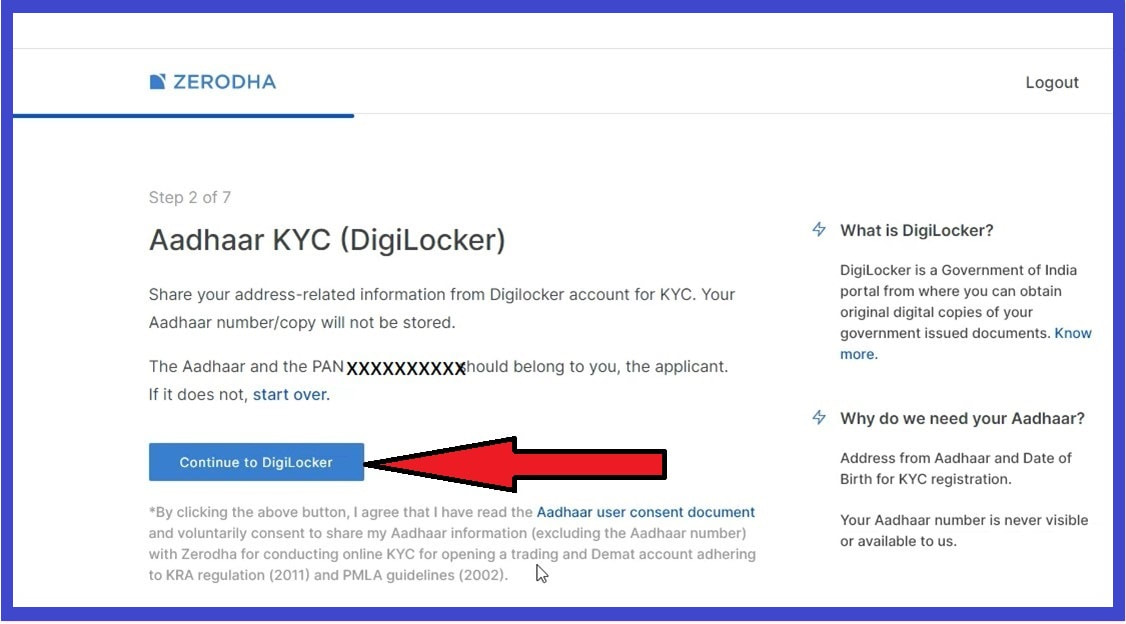
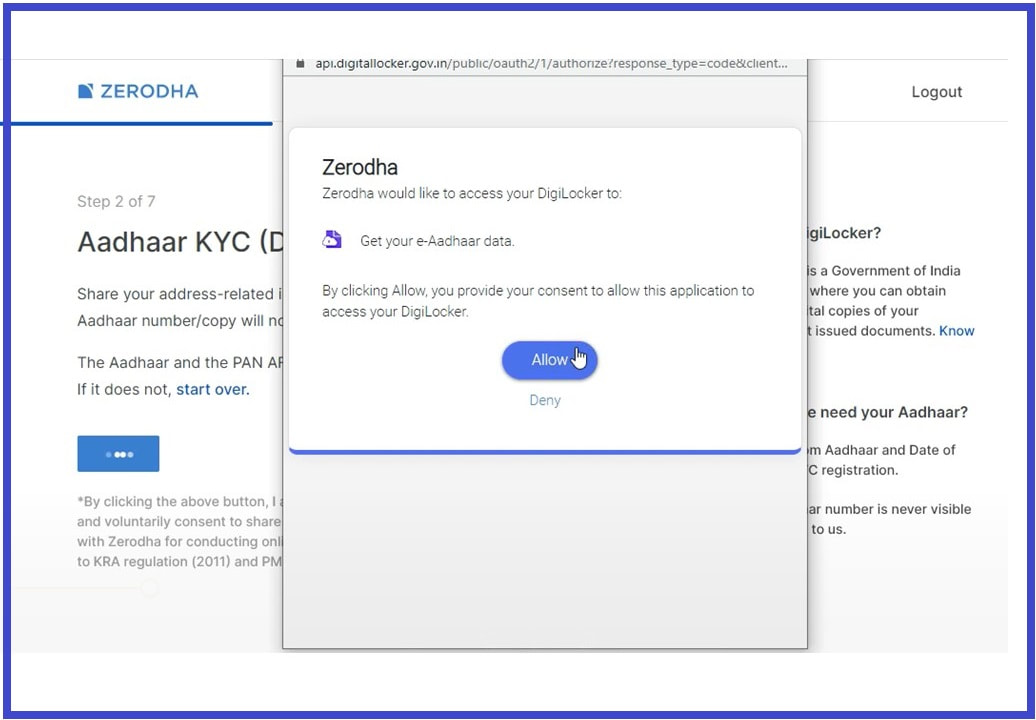
If your Aadhar is not KRA verified, you need to fill our aadhar details through Digi locker.
Zerodha will fetch the details of the Applicant such as Applicant Name, Father’s Name, DOB, and Address as per the registered KYC norms.
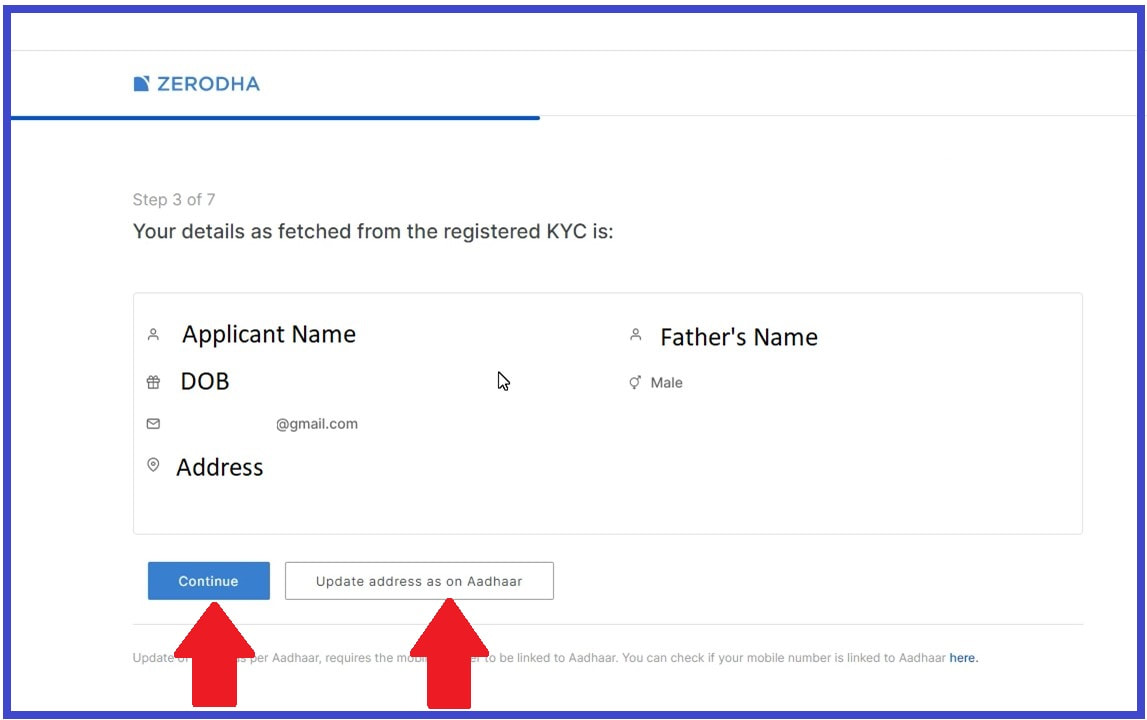
In case the address is the same as shown in the KYC details you can proceed further else select “Update address as on Aadhaar”
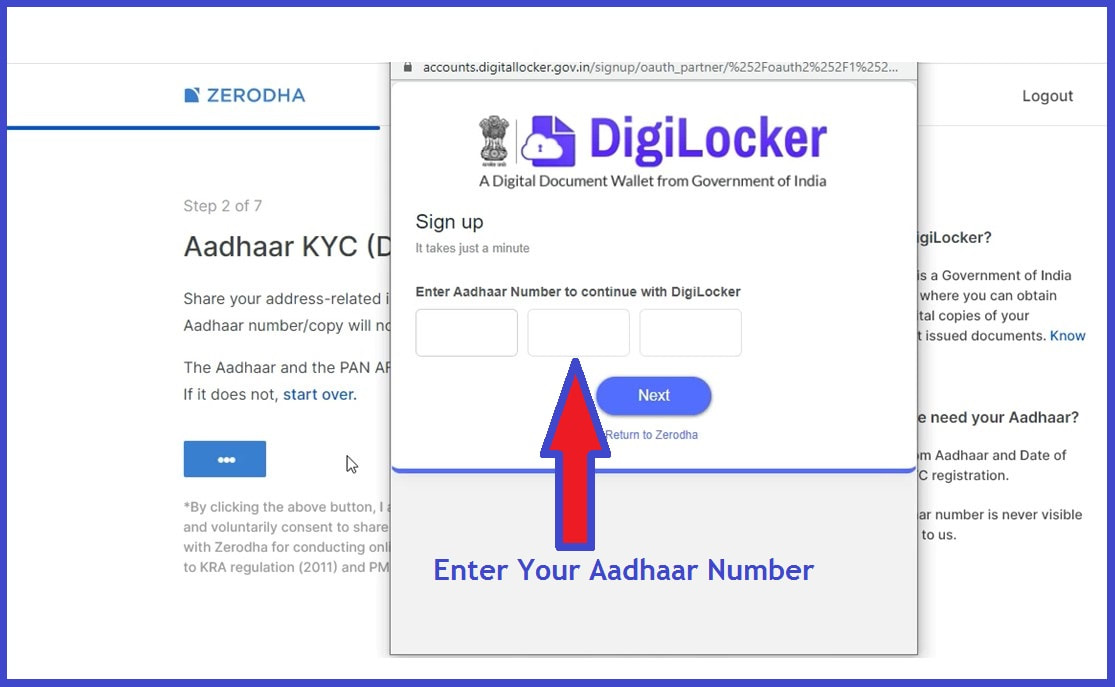
By continue using this option, Enter your Aadhaar Number
Now Allow Zerodha to access your DigiLocker to get the e-Aadhaar data.
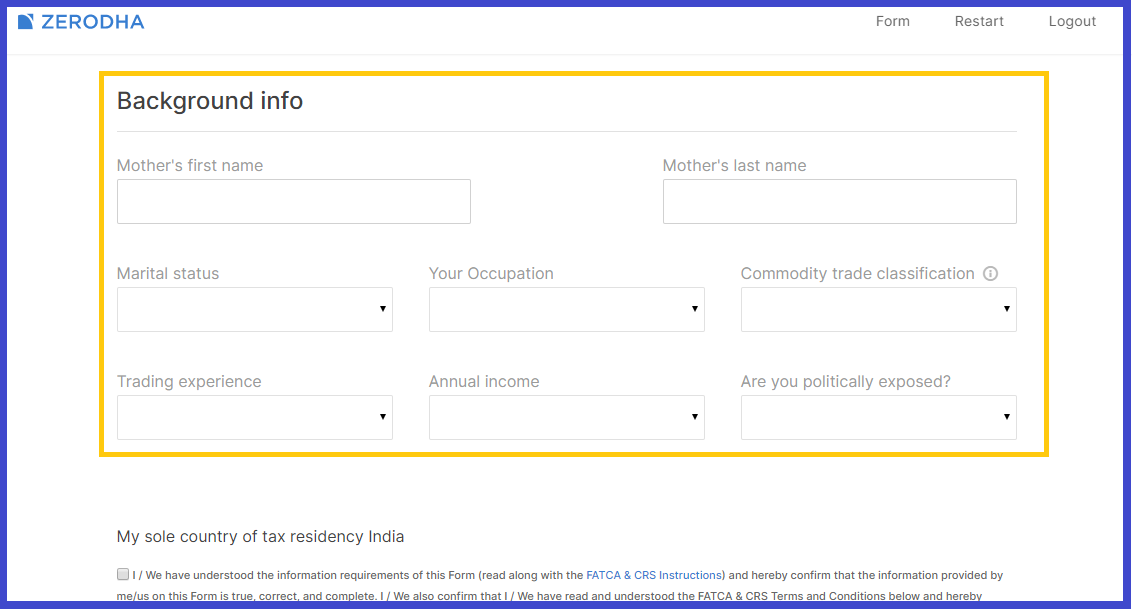
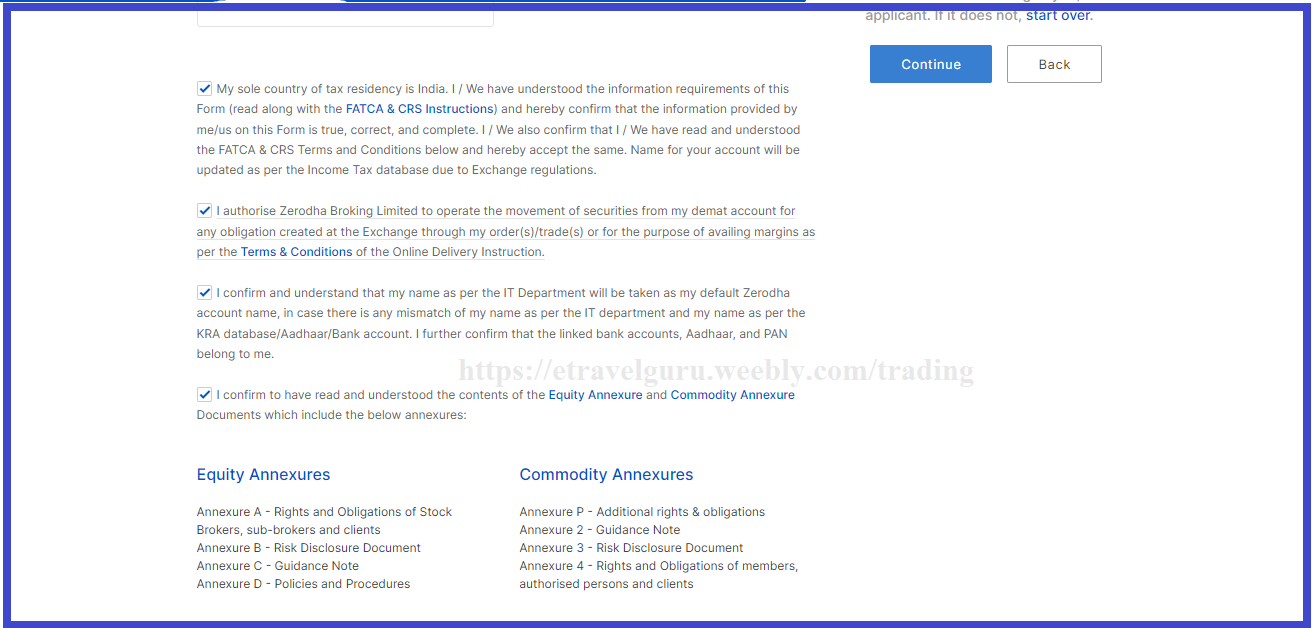
At this step of Zerodha Account Opening, Update your Profile by entering the basic details such as Parent’s details, Income, Marital status, Income Details, Trading Experience, Occupation, Funds, and Securities settlement preference, and whether you are a politically exposed person or not.
Fill in bank details like IFSC code, Bank account number, Confirm account number and select all the terms & conditions, and click on continue to proceed for the next step.
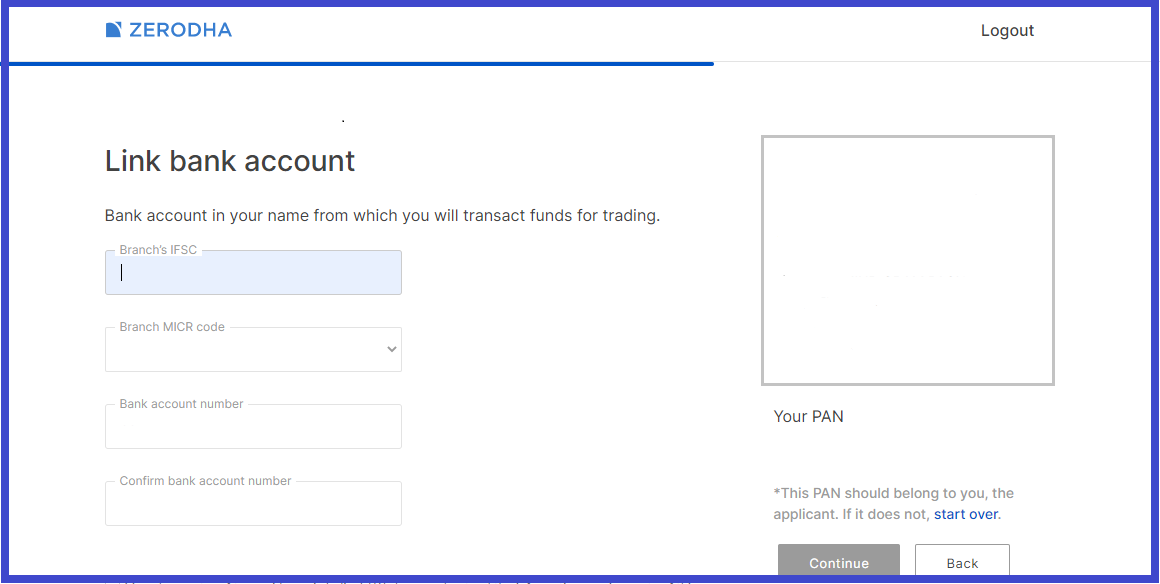
Enter Bank Details. Then click on continue....
IPV or In-person-verification is a process where a depository participant in personal verifies documents and other details as per the law by SEBI. It is compulsory for every investor to go through the in-person verification process before opening a demat and trading account.
First, you’ve to allow the Camera on your browser/phone to start to IPV process (check the below screenshot). You should click on the Allow button. If you click on the Block button, the camera will be disabled, and you may not be able to enable it easily. 
Next, they’ll display an OTP on the screen. You need to clearly write down this OTP shown on a piece of paper or your smartphone. Then, hold the piece of paper/ mobile phone with the code in front of your mobile phone/ webcam.
Make sure to take the correct photo while holding the OPT written on Paper. You can take reference of how the person takes the photo in the below screenshot. Finally, click on the capture button. Note: While taking the photo please don’t move here and there until it gets captured and hold the paper (OTP written paper) in front of the camera. 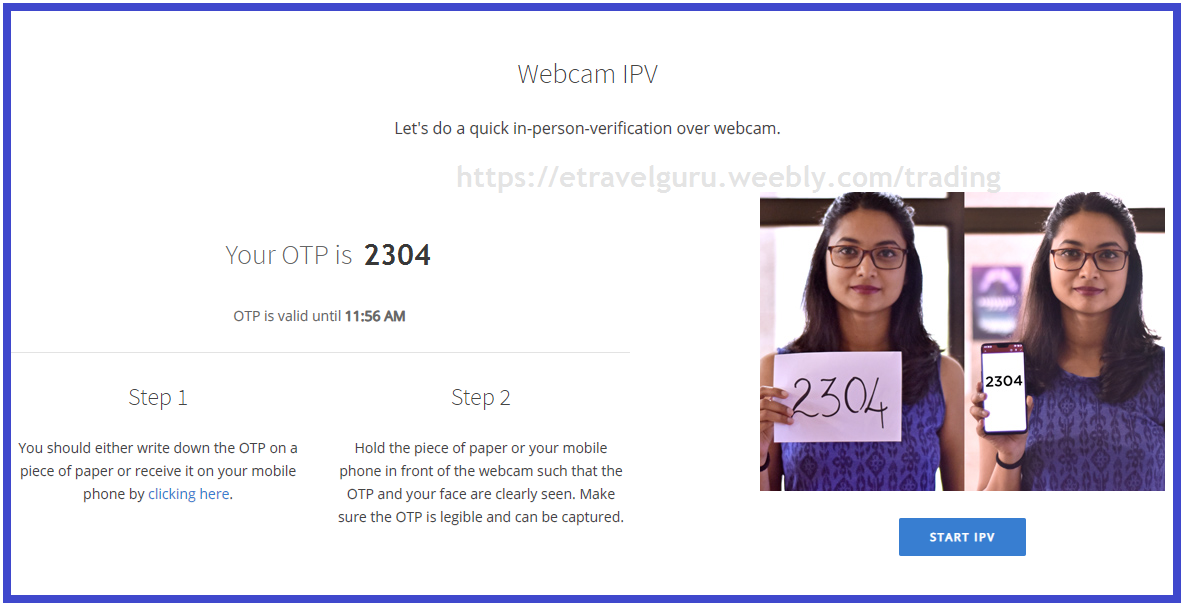
Upload the Zerodha Account Opening Documents which are Bank proof, Income proof (Optional) , Signature as per pan card (signature should be done with blue/black pen on a white paper), PAN copy ( PAN copy will not be accepted in pdf.)
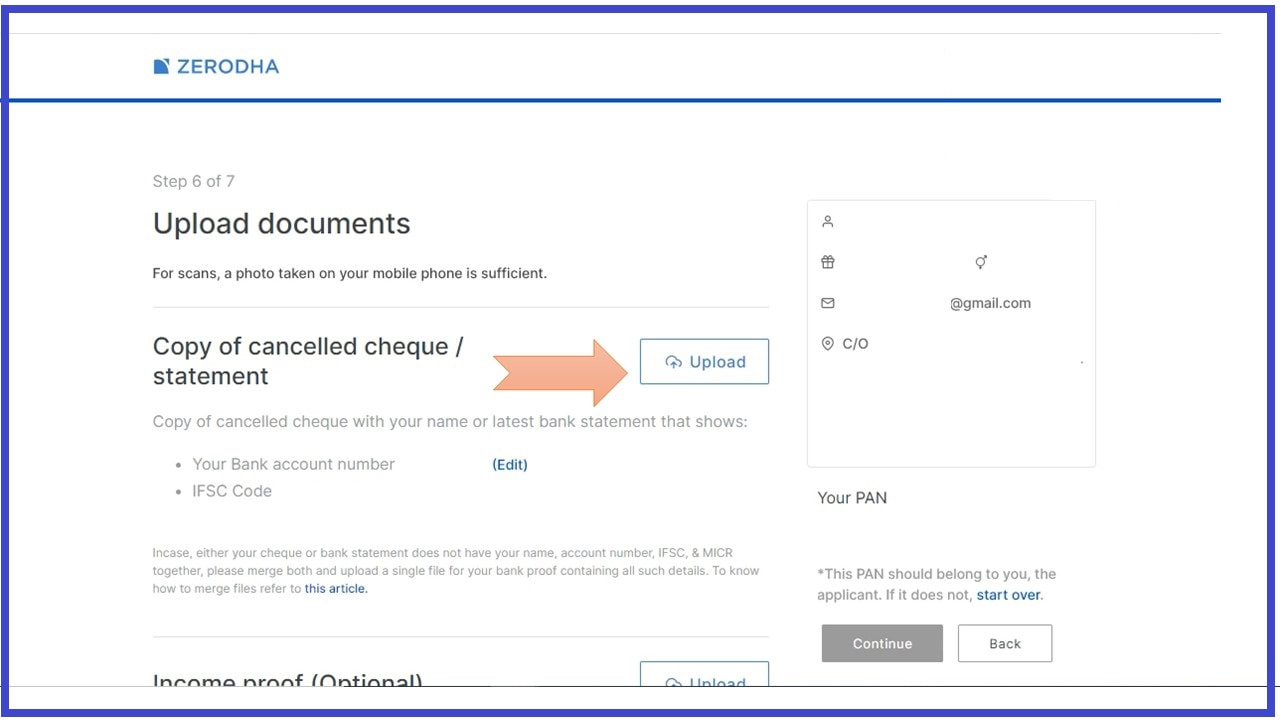
Upload Bank proof- Cancelled Cheque or Bank Statement
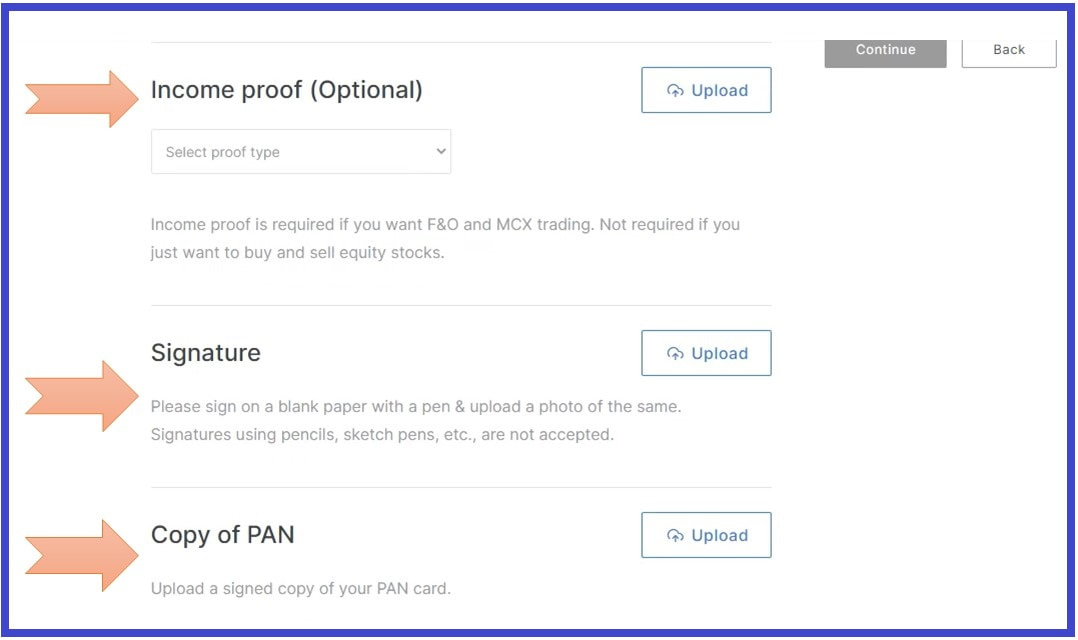
Signature as per pan card (signature should be done with blue/black pen on a white paper), PAN copy ( PAN copy will not be accepted in pdf.)
Next, it’s time to eSign. Click on ‘eSign Equity’ button and proceed to the next step.
Once you click on the eSign button, the following screen will appear. 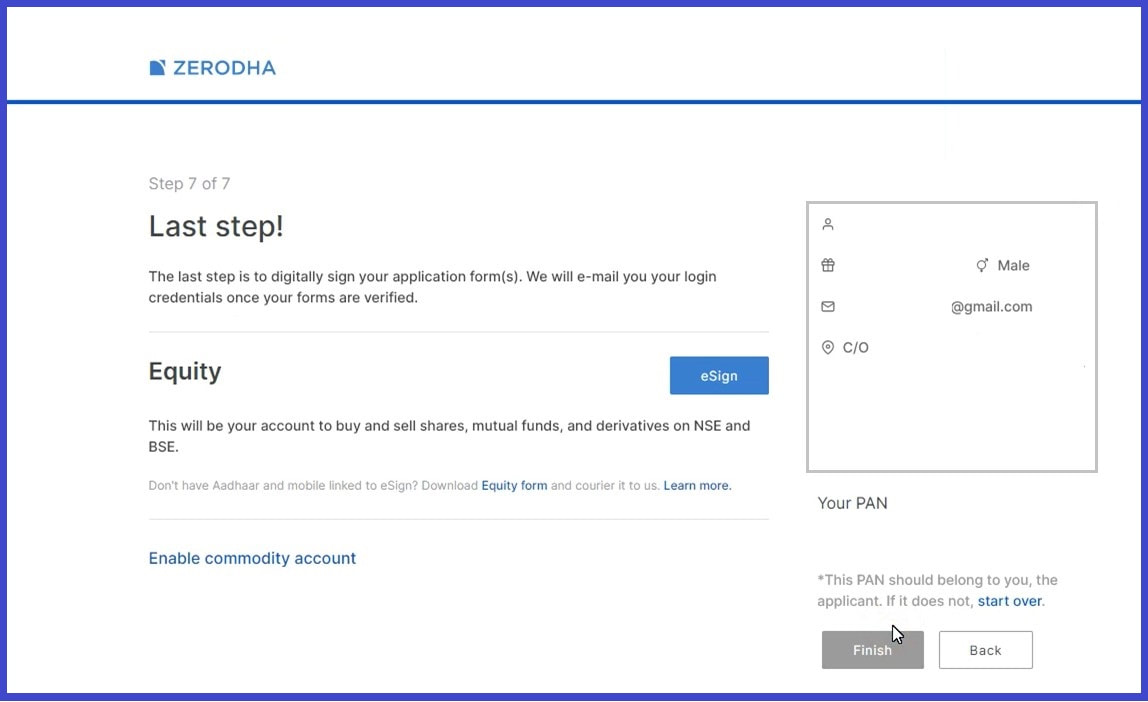
Now click on "Proceed to esign"
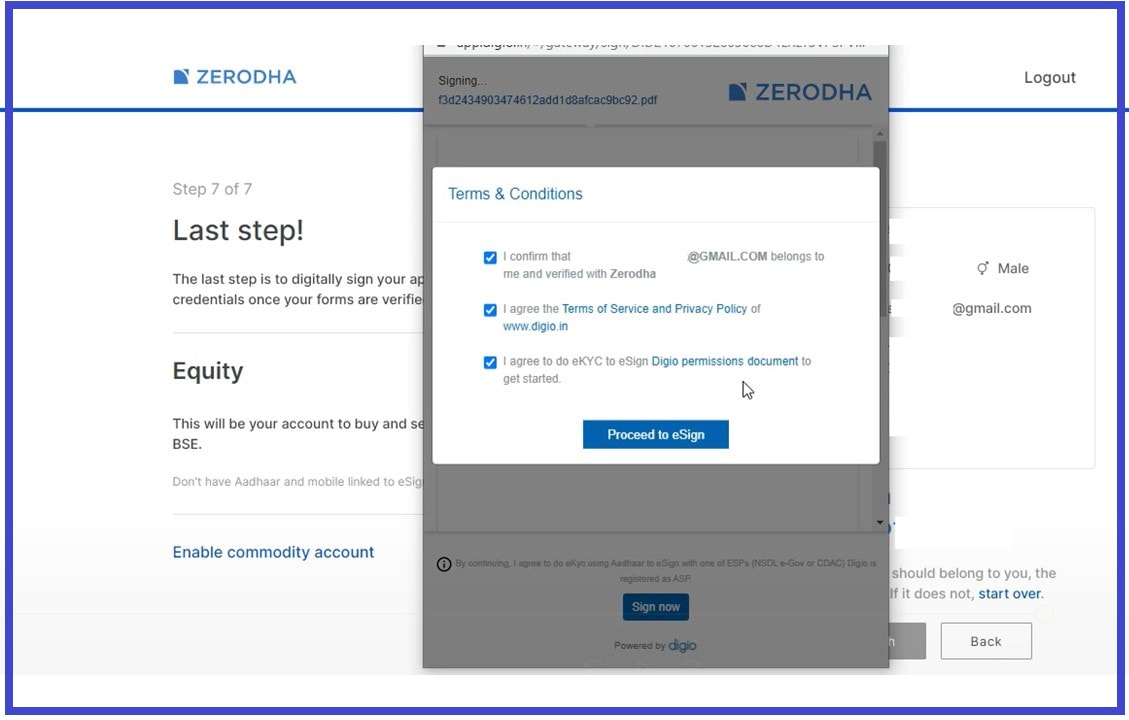
Once, you’re on the NSDL Page, Click on the check box top left stating “I hereby….”
Next, enter your AADHAR number at the bottom of the page and click on the Send OTP. Finally, enter the OTP and verify. 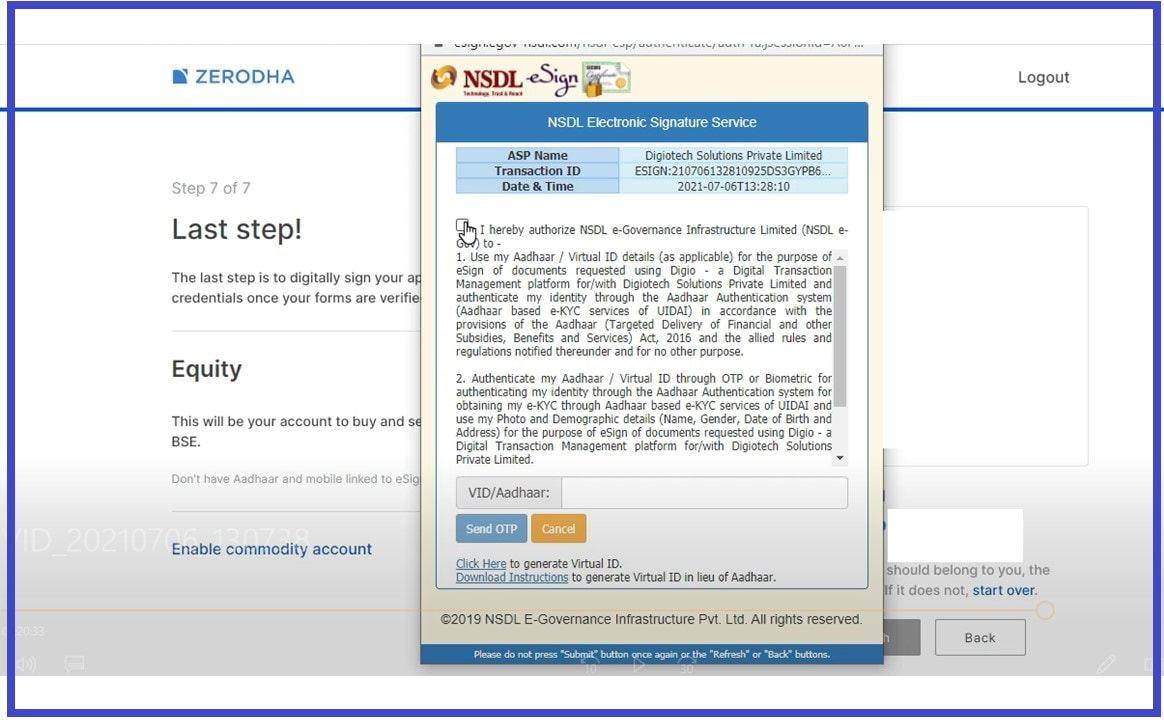

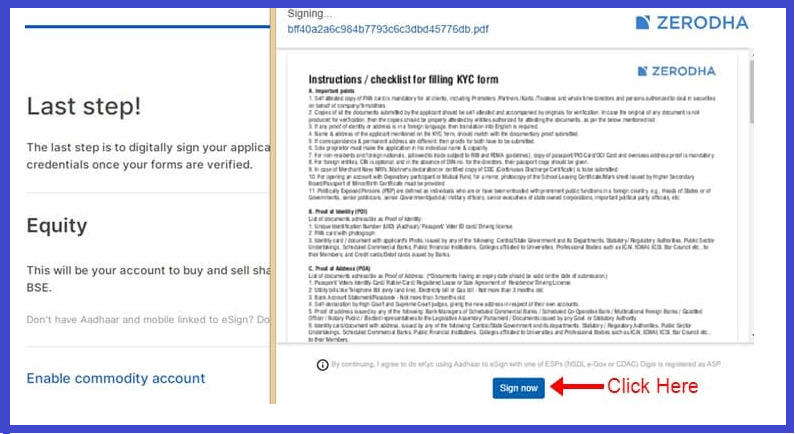
Now, click on the Sign Now button to the Sign on your E-sign form, as shown in the image below.
Next, you will be able to see the tick mark on the Equity segment which means that you’ve successfully signed up for this segment. You will also be able to download the eSigned Document on this page. click on Finish button.
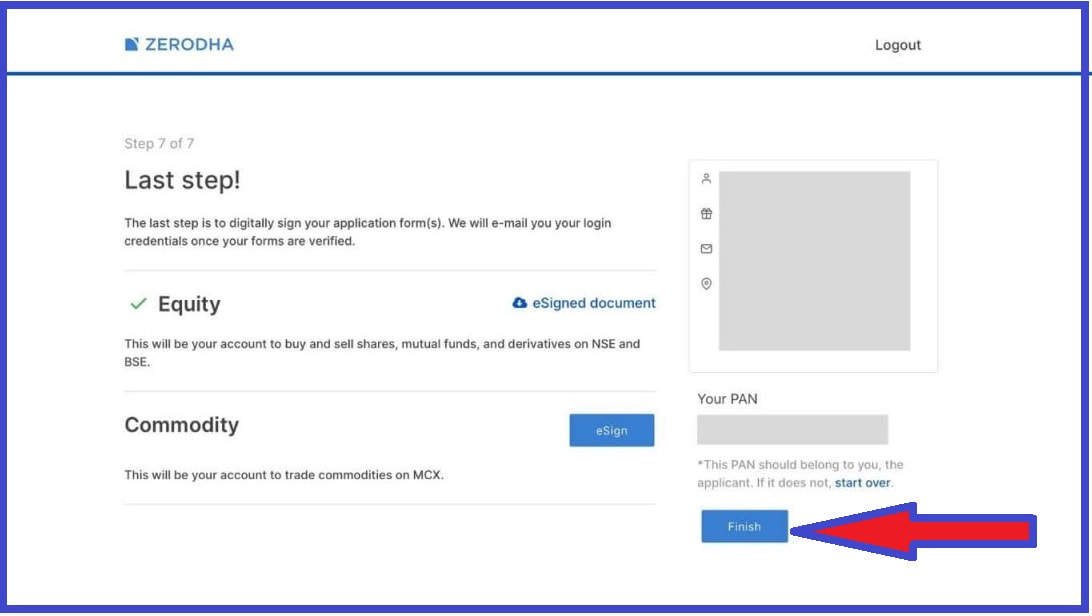

This step is applicable only for those who want to enable the commodity segment on their account. Here, they have to eSign again for the commodity segment.
Click on the commodity eSign. It will redirect you to the NSDL page. Next, click on the check box on the top left corner and enter the aadhar number. You will receive an OTP to the AADHAR linked mobile number. Once you enter the OTP and it is verified, the documents will be eSigned for the commodity segment too. 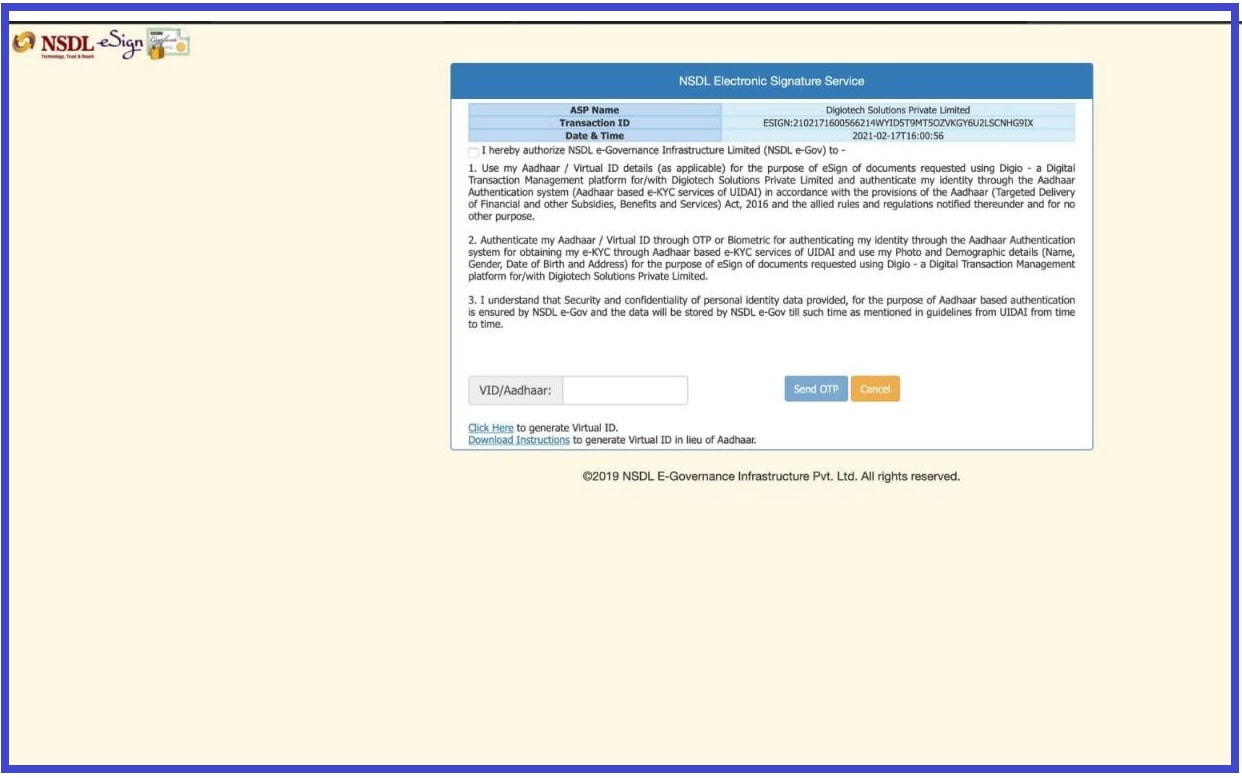

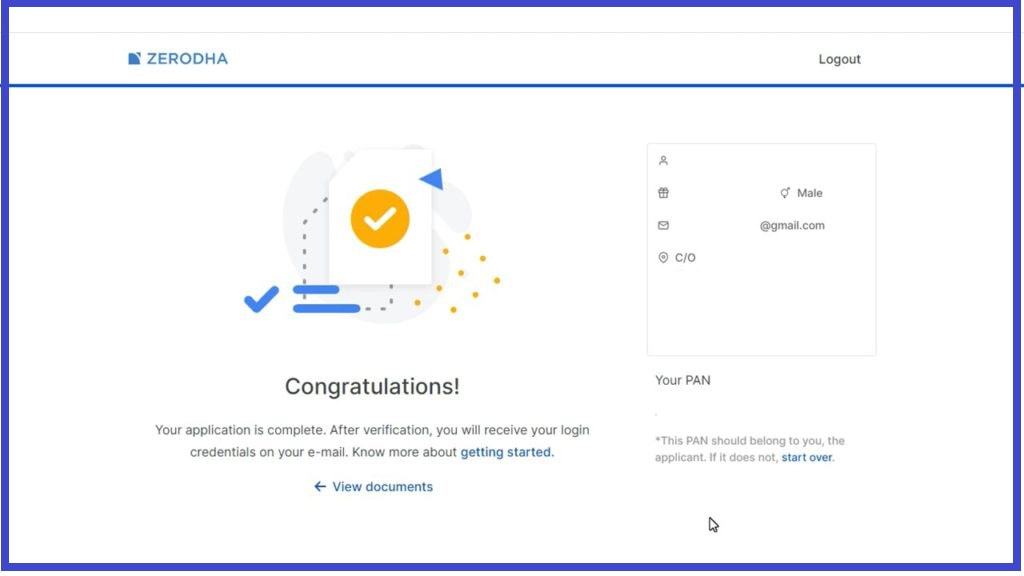
Congratulations, you have completed all the steps. A final Congratulations message will appear on your screen, once you’ve completed all the previous steps. Here’s the screenshot for your reference.
Once you complete all the steps, then the Zerodha document verification team will verify your documents. Once it’s verified, then you will get an email from the document verification team stating your documents are successfully verified. After receiving this email, you will get the login credentials within 24 hours.
What Next After Opening Your Zerodha Account?
Once your account is open, you can log in to this link or use the KITE app on your mobile.
Here’s the link to the KITE trading platform. |